To set up a store on a legacy Advanced Shop plan, install Elementor Core and WooCommerce directly from WordPress, download your ZIP files from My Elementor, and manually upload Elementor Pro, CommerceGurus, and Shoptimizer. Once installed, finish up by tweaking a few menu, typography, reading, and image dimension settings.
What do you need before getting started?
Important Note for Existing Users: The Legacy Advanced Shop plan and bundled Shoptimizer theme are discontinued and no longer available for purchase. Shoptimizer and CommerceGurus are not included with the Advanced Solo plan or any current Elementor hosting plans. This guide applies strictly to existing legacy account holders.
Setting up this storefront requires the following components:
- Elementor (Core): Installed directly from the WordPress plugin directory.
- WooCommerce: Installed directly from the WordPress plugin directory.
- Legacy Shop Package: The
.zipfile downloaded from your My Elementor account. - Elementor Pro: The
elementor-pro.zipfile inside your downloaded package. - CommerceGurus Plugin: The
CommerceGurus.zipfile inside your downloaded package. - Shoptimizer Theme: The
shoptimizer.zipfile inside your downloaded package.
How do you install and activate Elementor Core and WooCommerce?
- Log into your WordPress Dashboard and go to Plugins > Add New Plugin.
- Search for Elementor Website Builder and click Install Now.
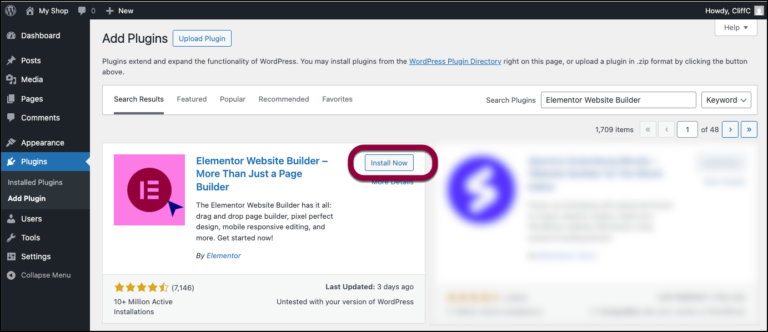
- Once installed, click Activate.
- Search for WooCommerce, click Install Now, and then click Activate.
- Click WooCommerce in the left menu to run the setup wizard for currency, payment, and shipping settings.
How do you download and extract the legacy Elementor Shop archive from My Elementor?
- Log into my.elementor.com.
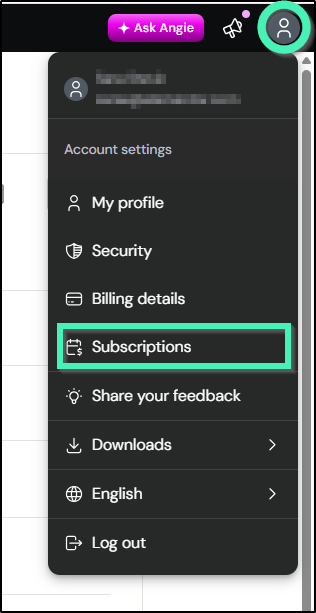
- Click your profile avatar in the top-right corner and select Subscriptions.
- Find your Legacy Shop subscription and click Download zip.
- Unzip the downloaded archive on your computer to access
elementor-pro.zip,CommerceGurus.zip, andshoptimizer.zip.
How do you upload and activate Elementor Pro, CommerceGurus, and Shoptimizer?
- In WordPress, go to Plugins > Add New Plugin and click Upload Plugin at the top.
- Choose
elementor-pro.zipfrom your extracted folder, click Install Now, and then click Activate. - Go to Plugins > Add New Plugin > Upload Plugin, choose
CommerceGurus.zip, and click Install Now - Click Activate, then follow the CommerceGurus Setup Wizard prompts.
- Go to Appearance > Themes, click Add New Theme, then Upload Theme. Select
shoptimizer.zipand click Install Now. - Click Activate.
How do you configure WordPress and Elementor settings for Shoptimizer?
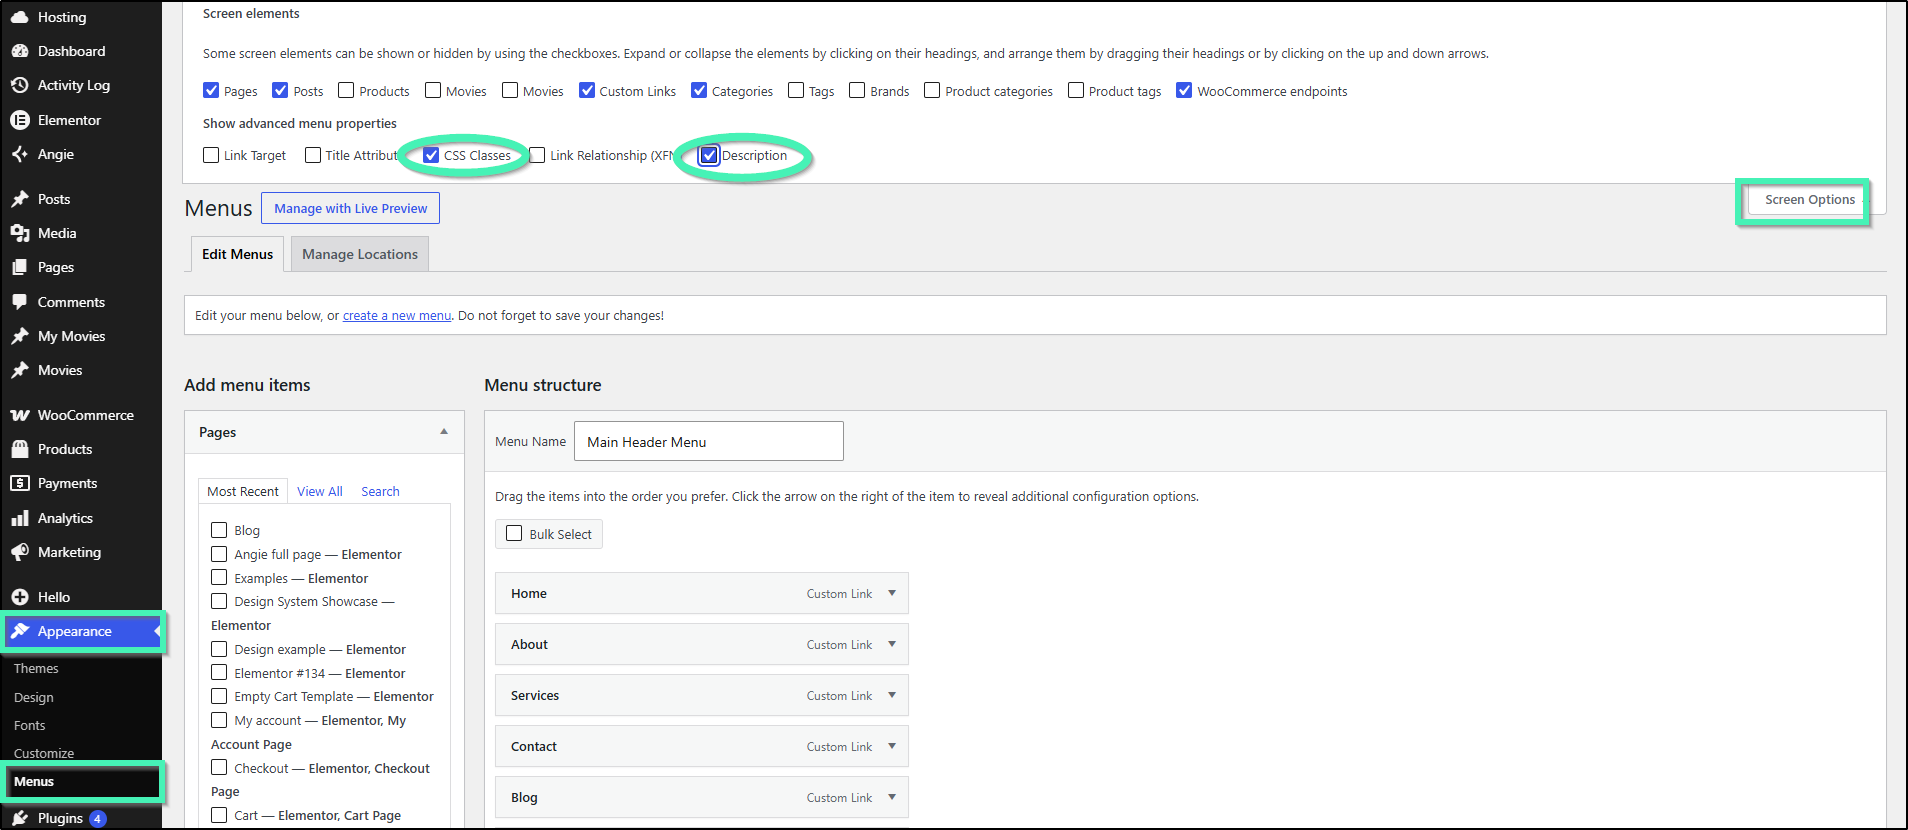
- Enable Menu Options: Go to Appearance > Menus, open Screen Options in the top-right corner, and check CSS Classes and Description.
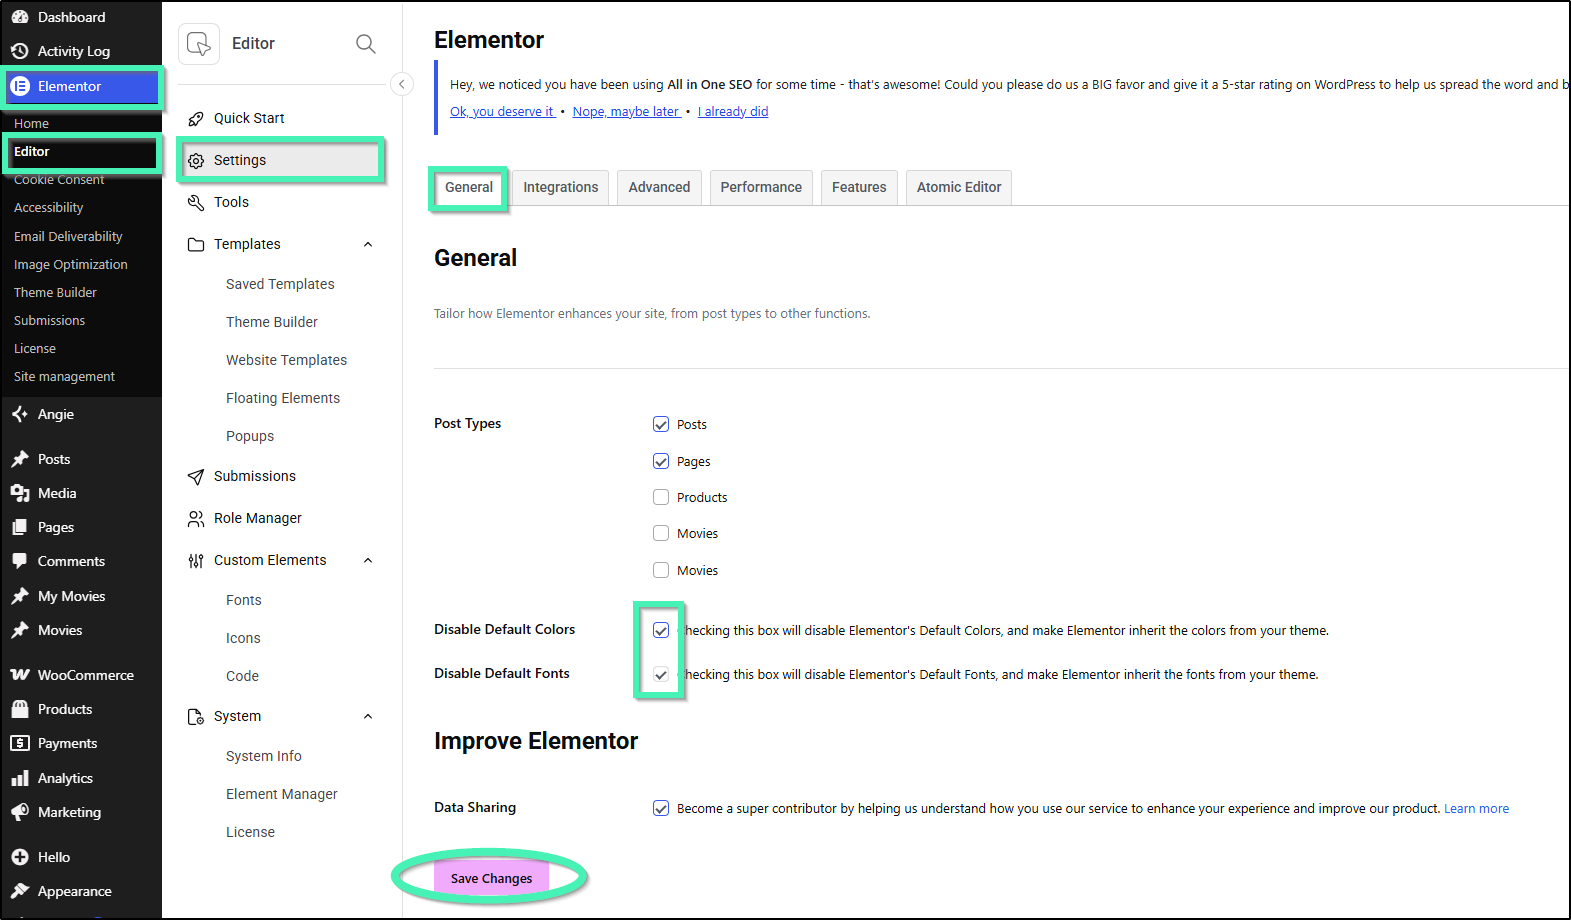
- Disable Default Styling: Go to Elementor > Editor > Settings, check Disable Default Colors and Disable Default Fonts, and click Save Changes.
- Set Static Pages: Go to Settings > Reading, select A static page, assign your Homepage and Posts page, set Number of recent posts shown on archive pages to
6, and click Save Changes.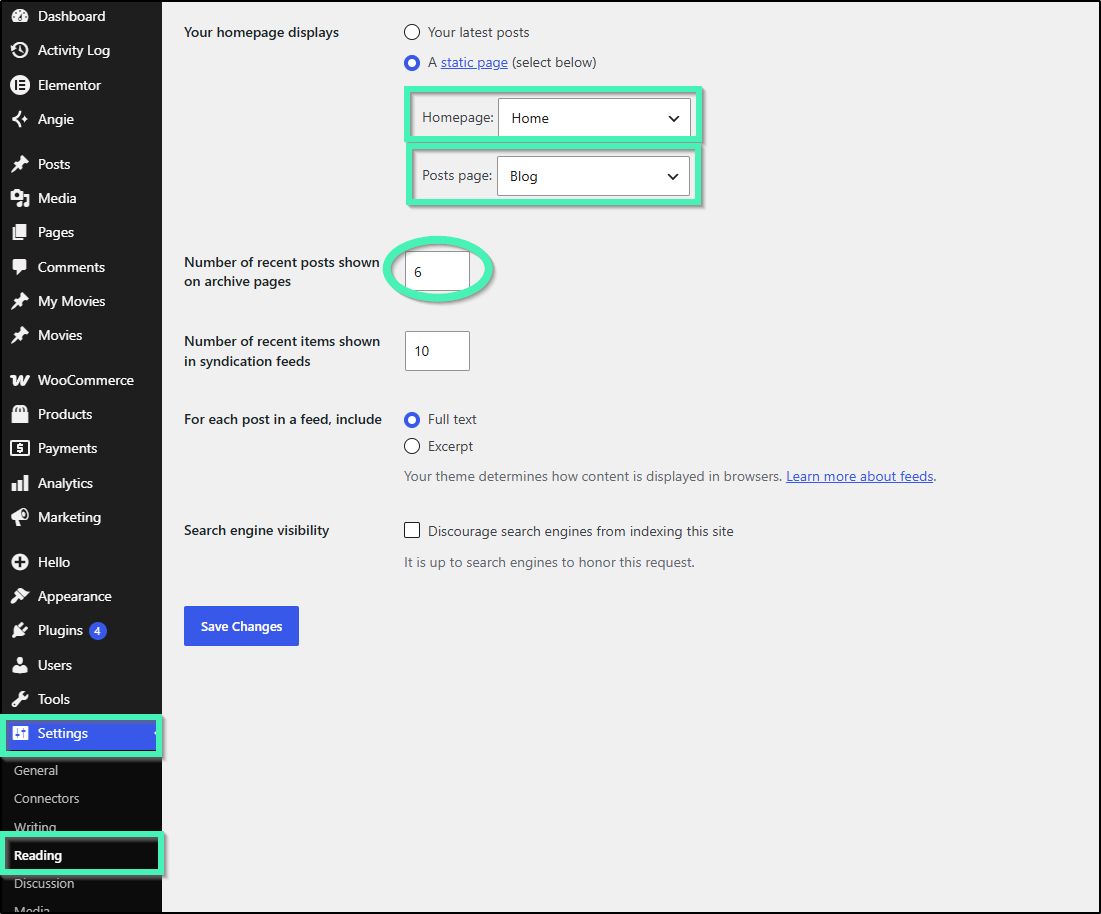
- Adjust Product Image Sizes: Go to Appearance > Customize > WooCommerce > Product Images. Set Main image width to
800, Thumbnail width to300, choose Uncropped, and click Publish.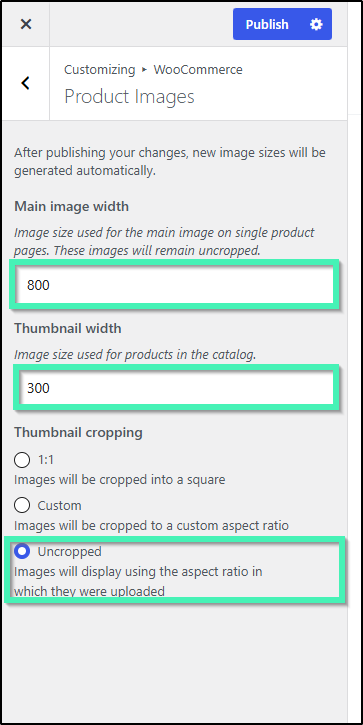
- Locate Site Settings: Open any page inside the Elementor Editor, open Site Settings from the top-left menu
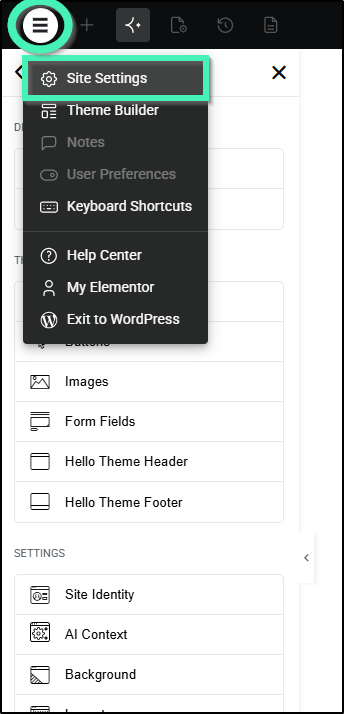
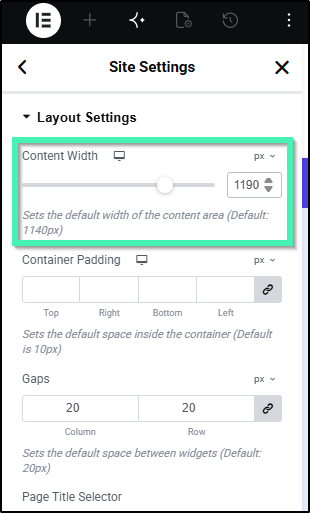
- Change Content Width: under Layout tab, change Content Width from
1140to1190, and click Save Changes.